
Preliminary Preparation - Before You Start Creating Your Website
1. Plan the information and images you would like on your web pages
We have already set out the basic structure of an artists website, by setting up a few pages so all websites will have the following pages:
- Home Page
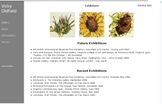
- Biography
- Contacts Page
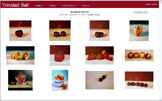
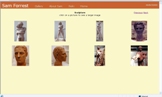
- Gallery Page
- Copyright statement
We have also put suggestions of what information would normally appear on these pages, but you will need to fill in the details. You will also need to decide how you would like to group your gallery images. You can have up to 12 images on each gallery page and up to 10 gallery pages. Possible suggestions for groupings are
- Type, e.g. still life, figure, landscape, abstract, etc,
- Medium,
- Sold or available,
- Current and previous work,
- Or perhaps a combination of these, or some other grouping.
In addition to the standard artists pages we have set up, you may wish to create additional pages of your own. You can have up to three additional pages. These might be
- A separate, exhibitions page (rather than having this information on the Biography page),
- Information about how to purchase your art,
- Background information about yourself,
- Or anything else.
---------------------------------
2. Photograph your artwork
-
You will need digital images of your artwork. If you do not want to get your work photographed by a professional photographer, following the tips below, should help you to get the best results:
-
The easiest way to get digital images of your work is to photograph them with a digital camera.
-
If you do not have a digital camera, most film developers can convert conventional camera film into digital images, which they can copy onto a disk for you. These images can then be copied onto your computer.
-
It is best to photograph your work outside, so that you do not need to use a flash.
-
However, the sun can give too much glare so take on a bright but overcast day, or take the picture in the shade.
-
Glazed pictures should be removed from the glass, as glazing often results in pictures being out of focus and may also cause glare.
---------------------------------
3. Prepare your images for uploading on to your website
Your digital images will still need some minor amendments before they can be loaded up to the website:
-
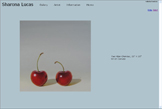
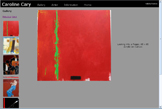
Remove the picture frame - It is general practice to remove the picture frame and any background from the images. See the Gallery page Examples. This can be done by cropping the image using photo editing software.
-
Enhance images - Images can also be enhanced by adjusting the contrast, brightness and colour. The best way is just to experiment and see what looks best. However, it is worth bearing in mind that the images should still look like the original artwork.
-
Resize images to a lower resolution - Most modern digital cameras take the pictures at a much higher resolution than is required for display on a computer screen. This makes the images very large and therefore the pages are very slow to be displayed which can be frustrating for visitors to your website. All images on Websites For Artists websites will therefore be automatically resized to give the maximum detail required for display on a screen, but no more than is necessary (typically size will be 450 pixels high. Before uploading your images to our website, you will need to resize them so that they are no more than 800 pixels wide by 600 pixels high. and at least 450 pixels high. (See Resizing Your Images for details of how to do this). Without this size restriction the pages would be quite slow. Another advantage of resizing the images in this way is that it helps to protect your copyright. This is because images at higher resolutions may be able to be reproduced, for postcards, or small prints, but displaying them at this lower resolution will mean that this would not be possible.
Now you are ready to begin creating your website. See
Creating Your Website